iManage Work
The iManage connector uploads documents to iManage. The connector includes export field options to dynamically search or browse workspaces (matters/cases), folders, users and document types etc.
Enabling Umango's iManage App
In order to connect to an iManage server instance, the Umango application must be enabled on the iManage server for your iManage instance. This process is slightly different for on-premise iManage and public cloud iManage users.
On-Premise iManage
Contact Umango support for the Umango app manifest file which will be required to install the Umango app on your server. Once you have the manifest file, follow the instructions provided in this iManage link while being sure to select the 2 options below while installing the manifest:
- Application Type: Native
- Allow Refresh Token: Enable
Public Cloud iManage
From the iManage Control Center, follow the steps in this iManage link to enable the Umango app in your app list. When enabling the app, be sure to enable the option to allow refresh tokens.
Settings
Connection
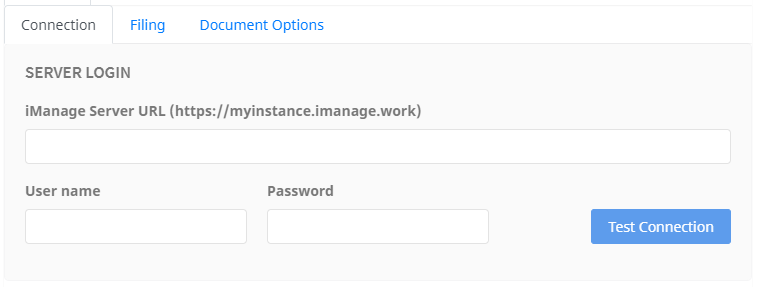
Server Login

Enter the URL to the iManage server. Once the appropriate user name and password has been entered, test the connection by selecting the "Test Connection" button.
iManage Database

Select the appropriate iManage database from the drop-down list.
Filing
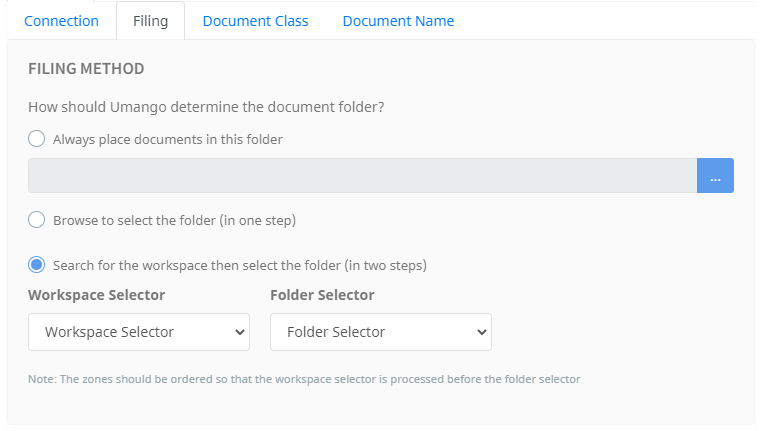
Filing Method

There are four options available for determining the folder Umango should use to upload the document. In other words, what selection or search logic does the user want to use to find the matter/case and its related folder. With each option, various export field zones need to be configured and assigned that provide the related information to the connector. These configuration options are:
- Always place documents in this folder - determine a fixed location for the document. Enter the file path in the field, or browse to the folder by clicking the blue button to the right of the field. No use intervention is required when documents are processed
- Browse to select the folder - select the Export Field Zone that will determine the folder for the document
- Search for the workspace then select the folder - using the export field zones, select the workspace and folder zones from their relevant drop-down menus. This option requires two export field zones to be setup. The first zone prompts the user to search or browse and select a workspace. The second zone prompts the user to browse to the required folder.
Where workspace and folder selection is configured for a 2 step process (ie. a zone for each selector) the workspace zone must be presented before the folder zone. To do this, ensure the zone sort order places the workspace zone first.
Author Assignment

When checked, the document author can be assigned using a merged field value. If unchecked, the iManage account that is configured in the connection tab is assigned as the document author.
Document Class

When determining the document type, two options are available.
- All will be the document type below - select the document type from the drop-down menu. The type selected will apply to all documents uploaded.
- Select the document type when processing - a user will use an Export Field Zone to assign the document type when processing.
Index Data Mapping

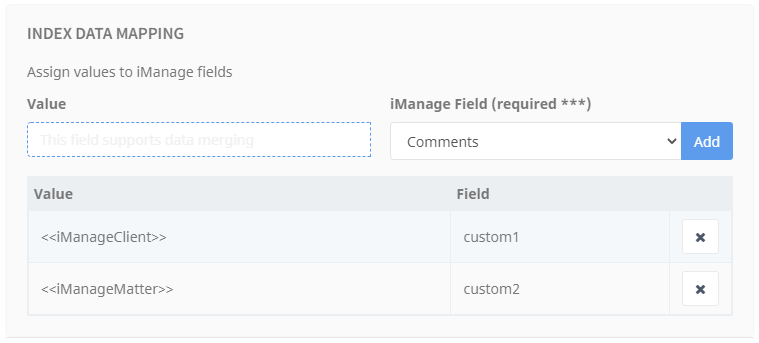
Documents will typically inherit the metadata of their parent folder by default. However, specific metadata can be assigned to the iManage custom fields and document comment field. To assign data to a field:
- Enter the text or merged data into the value field on the left
- Select the field you want to associate the data with from the drop down list on the right
- Once the field and value has been entered, press the "Add" button to set the data mapping
- Repeat steps 1 to 3 above for any other fields that need to be mapped
File Name

Name the file using the merge field.
File Type Options
File Type Options and related information are available here.